Whiteworm Season: Saving Diamond-Cut Alloys From a Cornish Winter
Photo: Derby Museums Trust, Rachel Atherton, 2004-11-19 14:13:00, CC BY-SA 2.0, via Wikimedia Commons
There is a specific moment in late November when a polished alloy goes from showroom-bright to faintly milky, and almost nobody notices it happening. Then February arrives, the lacquer lifts in a fingernail-sized patch, and by March you are ringing round for refurb quotes while the tyre fitter explains that the bead seat has been leaking for weeks.
Diamond-cut wheels are the worst offenders, and the UK's gritting regime is the reason. Not because salt is uniquely evil, but because of how it arrives: as wet brine, sprayed ahead of a frost, thin enough to creep behind lacquer and sit in the bead area for days.
Why the shiny ones suffer most
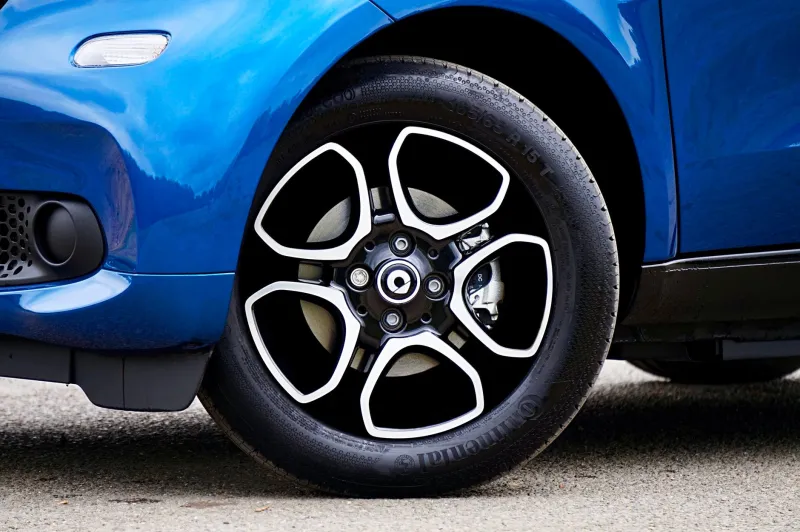
A diamond-cut alloy starts life as a painted wheel. The face is then turned on a lathe, shaving a few tenths of a millimetre off the spokes and rim lip to leave bare, bright aluminium with a machined texture. That freshly cut surface is then lacquered — and the lacquer is doing all of the work. There is no paint underneath it on the cut face, no primer, no second chance.
Two weak points follow naturally. First, the machined edge where the cut face meets the painted spoke is a sharp transition, and sharp transitions are where a lacquer film is thinnest and least flexible. Second, the rim lip takes stone strikes all winter. One chip and you have a microscopic entry point for brine.
Once water gets under the film, filiform corrosion does the rest. It travels sideways beneath the lacquer in fine white threads — hence whiteworm — rather than digging straight down. That is why the damage always looks bigger than it feels. By the time you can see a blister, the corrosion has usually been running for months.
The brine problem, and why kerbing makes it worse
Councils across the South West pre-treat main routes with brine before forecast frosts, which is genuinely effective and genuinely awful for wheels. Wet brine atomises under the car, coats the inside of the rim barrel, and pools around the bead. Add a bit of road grit and you have an abrasive paste sitting against a lacquered surface for the whole of January.
Kerb rash is the accelerant. A scuff on the rim lip breaks the film exactly where the tyre bead seals, and a slow leak develops that gets blamed on the tyre. Plenty of tyres get replaced every spring for a fault that lives on the wheel.
The November inspection, with a torch
Do this before the first proper gritting run, not after. Wheels on the car is fine; wheels off is better.
- Run a torch along the rim lip and look for a milky haze or a line of fine white threads under the clear coat.
- Look closely at the spoke edges where the machined face meets paint — that is where lifting starts.
- Check around the valve stem and centre cap, the two places water collects.
- Feel the inner bead area with a fingertip for roughness or bubbling paint.
- Look for dark streaks on the inside of the barrel, which usually means a bead leak is already underway.
- Check tyre pressures. A wheel losing 3–4 psi a fortnight is corroding, not just being British.
If you find whiteworm under intact lacquer, it is early and a refurb will likely save it. If the lacquer has flaked and the metal underneath is chalky and pitted, you have left it late.
Refurb or replace: the 2026 numbers
Costs vary by region and by how fussy the finish is, but here is the realistic shape of it for a typical 18-inch wheel.
| Option | Typical cost per wheel | Notes |
|---|---|---| | Diamond-cut refurbishment | £75–£110 | Includes strip and refit of tyre; recutting removes metal, so it can only be done a limited number of times | | Powder coat, single colour | £55–£80 | Durable, but you lose the machined finish | | New aftermarket alloy | £130–£260 | Check load rating and offset, not just the look | | New OEM wheel from a dealer | £300–£550 | Painful, but often the only exact match | | Used single from a breaker | £60–£140 | Verify part number, width, offset and load rating before paying |
A set of four refurbs at £90 each is £360 — roughly the price of one dealer wheel, which is why most people refurbish. The catch is that a recut takes material off the face, and a wheel that has been cut twice is getting thin at the lip. If yours has already been done once and is corroding again, replacement starts to make more sense than a third pass.
Insurance rarely helps here. Corrosion is treated as wear and tear, and kerb damage is nobody's fault but yours. Some comprehensive policies will cover a wheel replacement where a pothole also destroyed the tyre, but a lacquer blister is not a claim.
There is also the trade-in angle. A car with four milky, whitewormed alloys reads as neglected at part-exchange, and the valuer will price that in far more harshly than the £360 a refurb would have cost you.
A pre-winter routine that actually earns its keep
Ninety minutes in November beats a spring refurb bill.
- Clean properly, not aggressively. A pH-neutral wheel cleaner and a soft brush. Acid-based brighteners strip protection and accelerate exactly the failure you are trying to avoid.
- Decontaminate. Iron fallout remover, then a tar wipe on the barrels and behind the spokes. Bonded contamination traps moisture against the finish.
- Rinse and dry fully. A microfibre and a blast of air around the valve, centre cap and bead area. Trapped water under fresh sealant is a self-inflicted wound.
- Wipe the cut faces with IPA so the sealant bonds to the lacquer rather than to old wax.
- Seal with two thin coats of a polymer sealant or spray ceramic. Thin and layered beats thick and gloopy every time.
- Touch in chips on the machined edge with a clear lacquer pen as soon as you spot them. This is the single highest-value five minutes of the year.
- Rinse the arches weekly through the gritting season, ideally with a pressure washer kept at a sensible distance.
- Skip the kerb. Obvious, and yet here we are.
One more thing worth knowing: avoid the hand car wash that sprays a hot acidic wheel cleaner and blasts it off in ninety seconds. That is a shortcut to whiteworm, and it happens to thousands of cars in this part of the world every winter.
The bottom line
Diamond-cut alloys are a finish, not a material, and a finish is only as good as its edges. Inspect in November, seal before the brine, touch in chips as they happen, and refurbish while the corrosion is still a white thread rather than a pitted crater. Do that and spring stays cheap.